Downloading a Site Backup on Scout
Need a local copy of your website? Whether you’re archiving, migrating, or just being extra safe, this guide shows you how to create and download a complete backup in Scout.
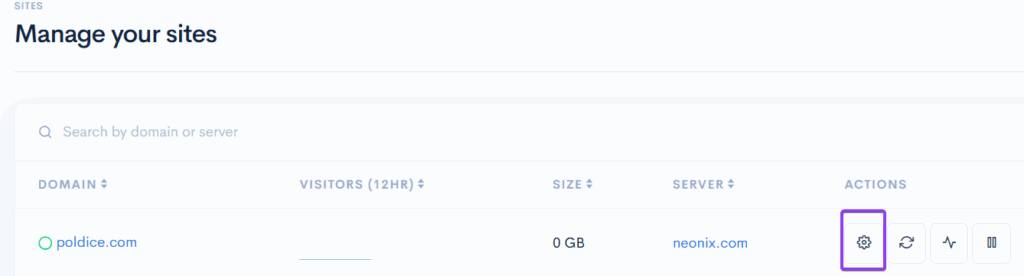
Step 1: Open Site Settings
Log into cloudabove.com and open your Scout Control Panel. You’ll see your sites listed on the dashboard.
Click the Settings icon next to the site you want to back up.
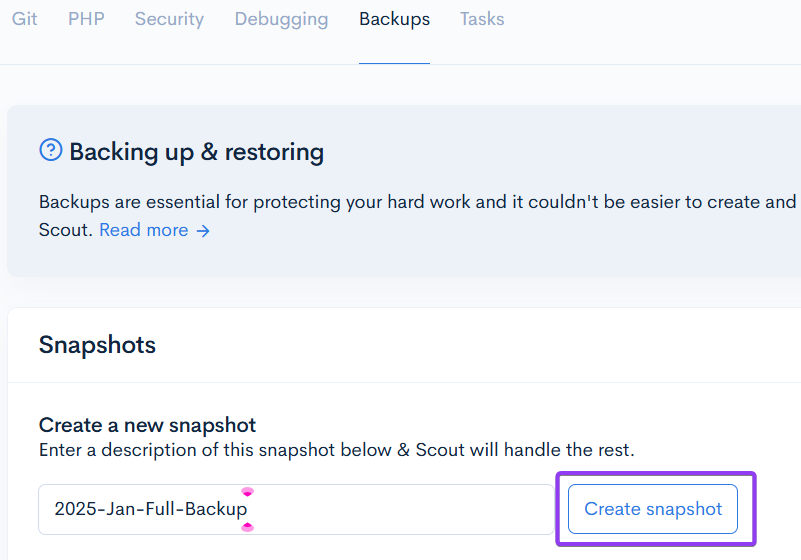
Step 2: Go to Backups
In the site settings menu, navigate to the “Backups” section.
Step 3: Create a Snapshot
You’ll see the “Snapshots” section—this is where you create downloadable backups that include both your site files and database.
Give your backup a meaningful name in the label box (like “2025-Jan-Full-Backup” or “Pre-Launch”), then click “Create snapshot”.
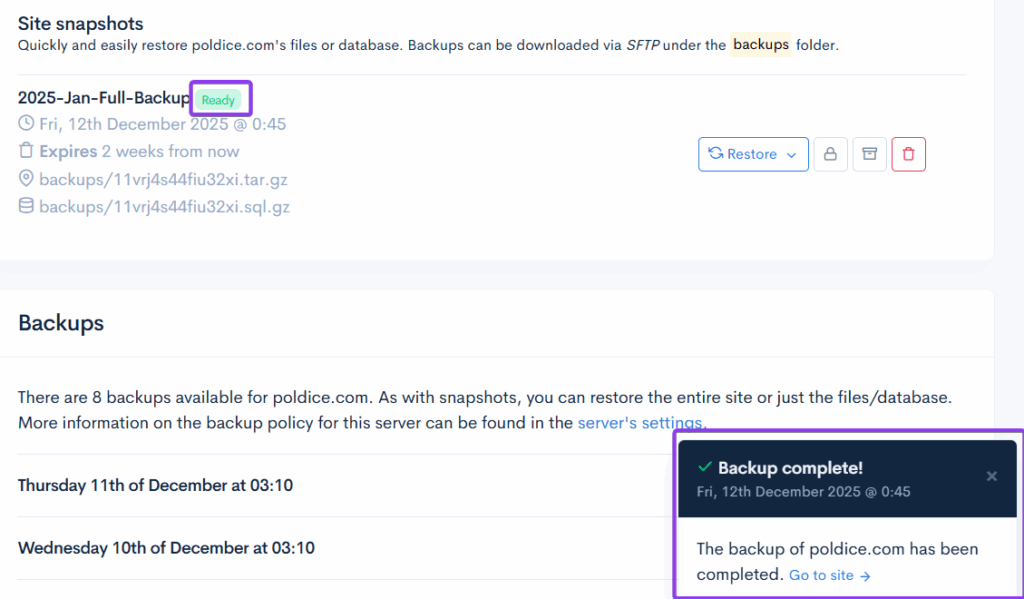
Wait for the Backup to Complete
Your backup is now processing in the background. Depending on your site’s size and complexity, this could take anywhere from a few seconds to several minutes.
You’ll see a pop-up notification in the lower right corner when it’s done. You can also check the Backups section—look for a “Ready” status icon next to your backup.
Download Your Files
Now it’s time to grab those files to your computer.
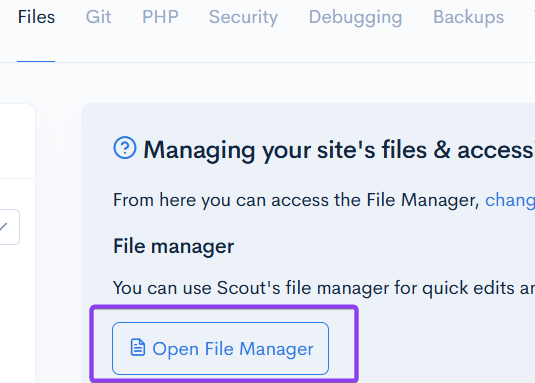
In the site settings, go to:
- “Files” section
- Click “Open File Manager”
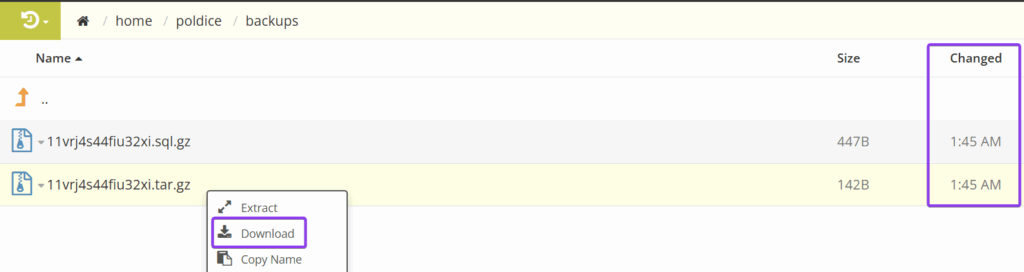
Find and Download Your Backups
Navigate to the “backups” folder. You’ll see two files with random names—one contains your website files, the other contains your database. Both are essential.
You can confirm these are your recent backup by checking the modification date/time on the right. It should match when you created the snapshot.
To download both files:
- Right-click the first file
- Select “Download”
- Repeat for the second file
Both files will download to your PC. You now have a complete, local copy of your website.
What’s Next? Keep these files safe for archival, or send them to a developer if they need them for migration or troubleshooting.
Questions or suggestions? We’d love to hear from you.