Setting up Git Webhooks in Scout Control Panel
So you’ve got your site setup to use a Git Repository and you now want to automate the process a bit, Scout allows you to configure Git Webhooks for automatic pull and deployment of code from your Repositories.
Obtaining the Webhook URL:
Login to your cloudabove account
- Login to your Customer Portal account.
- Click on Scout Control Panel in the top row.
Open the Site settings
- In Scout, you’ll see a list of your Sites.
- Find the site you want to manage.
- Click the Settings cog icon beside that site.

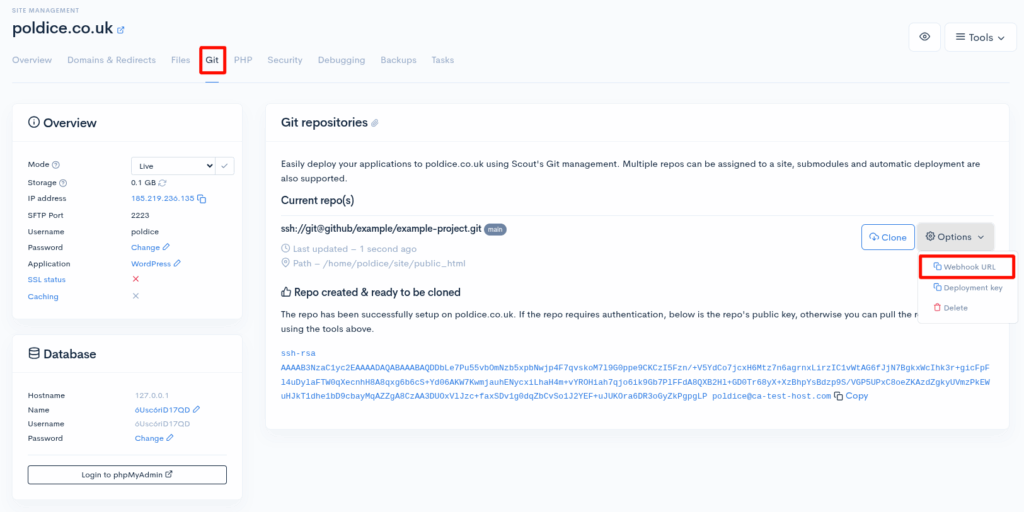
Copy the Webhook URL for the repository
- Navigate to Git.
- Click on the Options drop down and select Webhook URL option to copy the URL to your clipboard.
Adding the Webhook to Git:
Navigate to your Git Repository
- Login to https://github.com
- Find the repository that you wish to use with Scout.
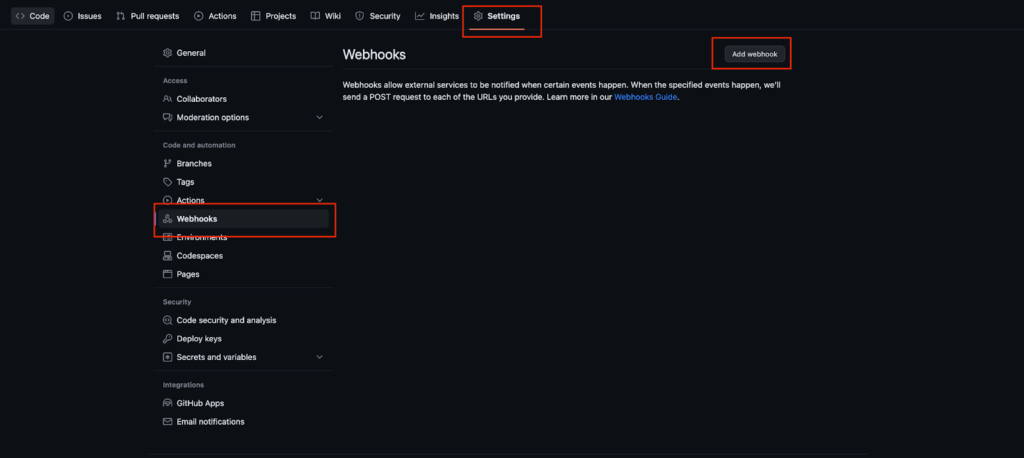
Add the Webhook
- Click on Settings located in the bar at the top of the page.
- Navigate to Webhooks.
- Click Add Webhook.
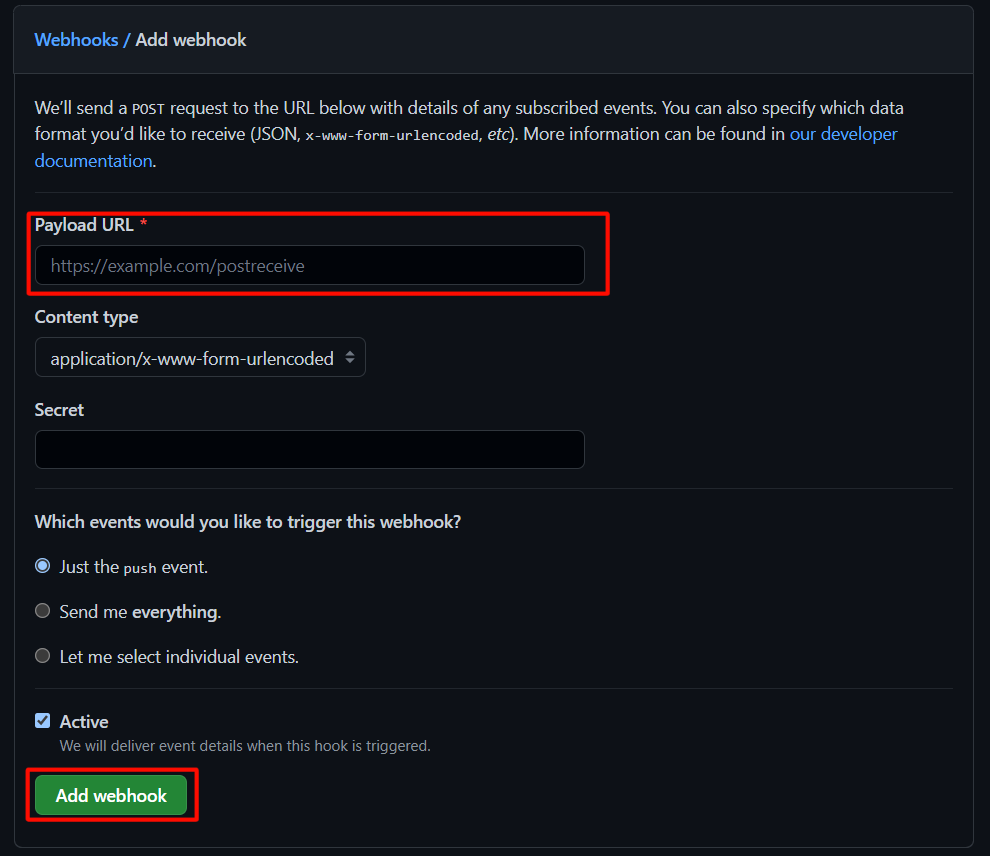
4. Paste the Webhook URL in the Payload URL box.
5. Click Add Webhook at the bottom of the page.
That’s it, you’ve now setup a Git Webhook in Scout.
If you are running into any issues or have any further questions or concerns, please don’t hesitate to get in touch.