Thunderbird – Adding your email address

Adding your email to Mozilla Thunderbird
Adding your email account to Mozilla Thunderbird allows you to manage your emails all in one place. This guide walks you through the steps to get started using Thunderbird for your emails.
What you require:
Before you begin, make sure you have:
- Your full email address (e.g., yourname@yourdomain.com)
- Your email password
- Incoming and outgoing mail server details
Steps To Adding your email
1. Open Thunderbird
Launch Mozilla Thunderbird on your computer.
2. Go to Account Settings
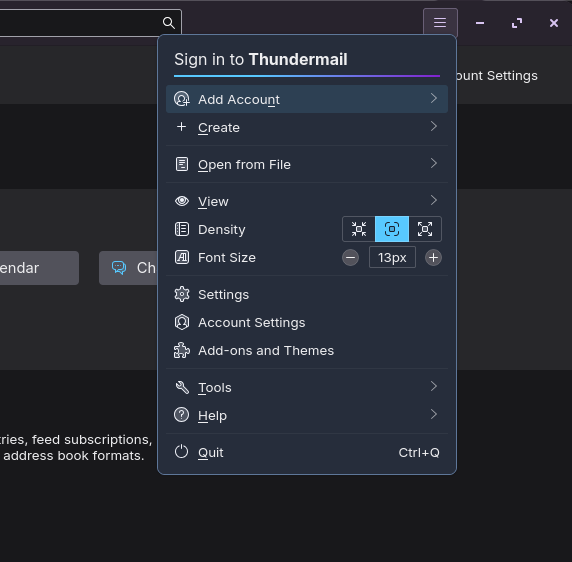
- Click the hamburger menu (☰) in the top-right corner and click “Add Account”, or click Tools in the menu bar.
- Select Account Settings.
- At the bottom of the Account Settings panel, click Account Actions, then choose Add Mail Account….
(Alternatively, if this is your first account, Thunderbird may show a “Set Up Your Existing Email Address” screen automatically.)
3. Add a New Account
- Enter your Name (as you want it displayed to recipients), Email Address, and Password.
- Click Configure manually (instead of letting Thunderbird auto-detect settings), so you can enter the server details yourself.
4. Select Account Type
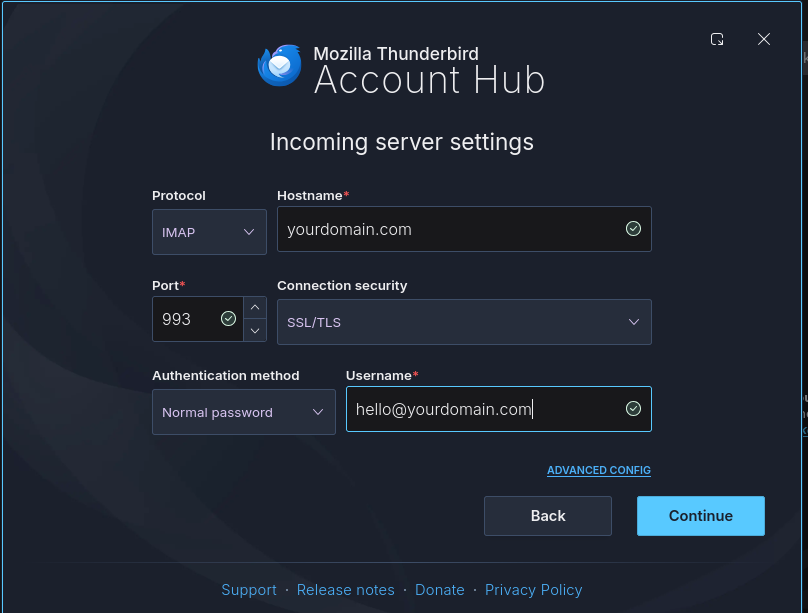
Under the manual configuration options, choose IMAP as the incoming account type.
5. Enter User and Server Information
Fill in the following fields:
- Incoming (IMAP) server: e.g., yourdomain.com (or mail.yourdomain.com)
- Incoming port: 993
- Connection security: SSL/TLS
- Authentication: Normal password
- Outgoing (SMTP) server: e.g., yourdomain.com (or mail.yourdomain.com)
- Outgoing port: 465
- Connection security: SSL/TLS
- Authentication: Normal password
- Username (incoming and outgoing): your full email address
Click Re-test (Thunderbird will verify the settings) or Done/Advanced config as needed.
Incoming:
Outgoing:
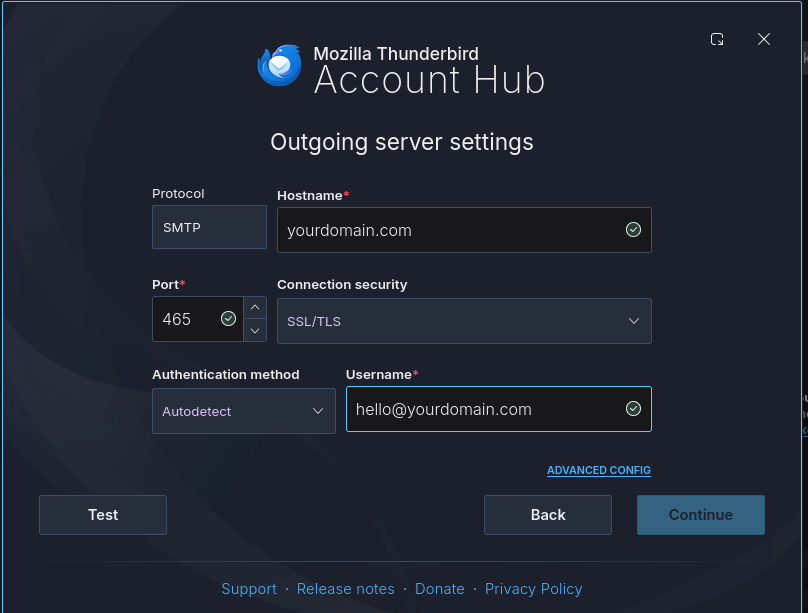
Note: After submitting your details, please click “Test” for Thunderbird to verify the settings.
On the next page, you will be prompted to enter your mailbox password.
Your account should then be verified and added to Thunderbird. Once the setup connection is successful, Thunderbird will confirm the account has been added and display it in the folder pane on the left. Click Finish (or close the Account Settings window) and you can start sending and receiving emails right away.
Your email account is now configured in Mozilla Thunderbird.