Adding an SSH key in Scout Control Panel
Sometimes you’ll want to allow SSH/SFTP access to your sites to a colleague or a web developer, but maybe you’re not comfortable with handing over the SSH/SFTP password.
Another method for allowing access is to add a public SSH key to the site.
Login to your cloudabove.com account
- Login to your account Customer Portal
- Click on Scout Control Panel in the top row.
Open the Site settings
- In Scout, you’ll see a list of your Sites.
- Find the site you want to manage.
- Click the Settings cog icon beside that site.

Add the SSH key
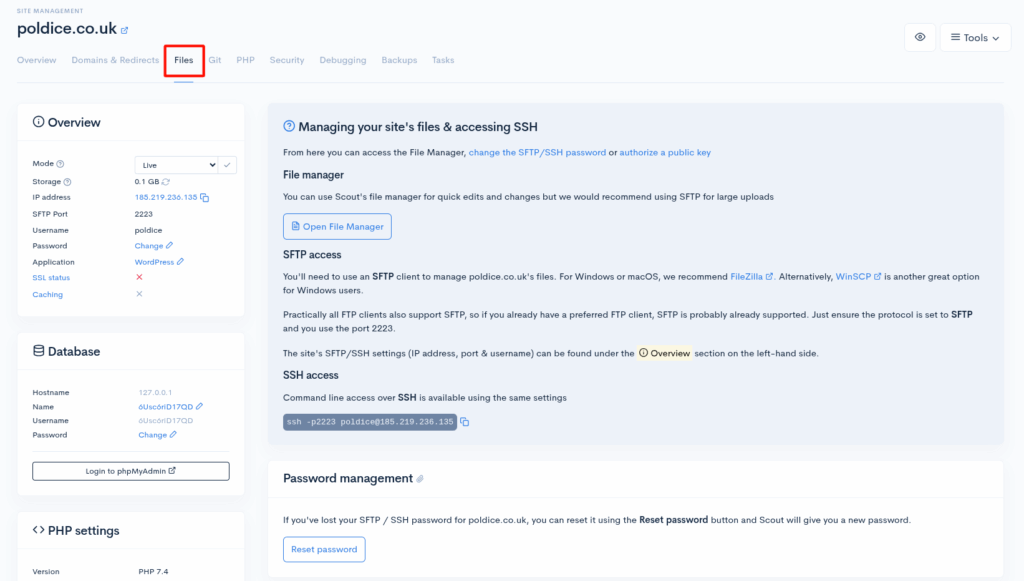
- Navigate to Files using the tabs at the top.
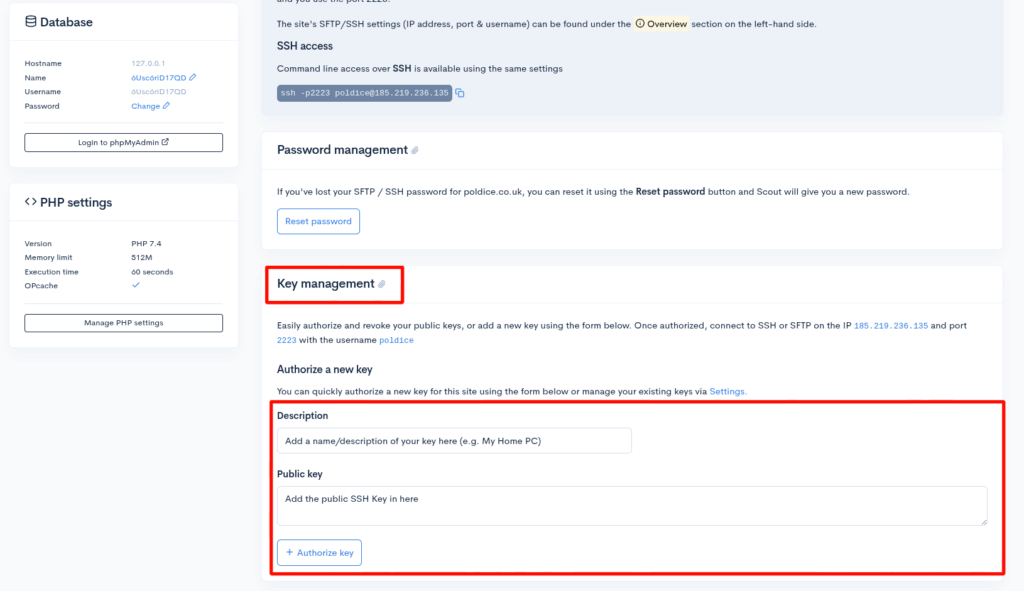
- Navigate to the Key management section lower down the page.
- Add your public SSH key and give it an appropriate name.
- Click Authorise key which will add and automatically authorise the SSH key on the site for you.
That’s it, you’ve now added an SSH key to a site in your Scout Control Panel
If you are running into any issues or have any further questions or concerns, please don’t hesitate to get in touch.