Creating an email account in cPanel
Creating a custom email address for your domain (e.g., info@yourdomain.com) is easy with cPanel. This guide will show you how to create an email address using cPanel and you can start sending professional emails.
Steps for creating an Email account:
1. Log in to Your cPanel Account
- Use the hosting login credentials provided by cloudabove.
- Access cPanel by visiting:
https://yourdomain.com/cpaneland input the login details on the form
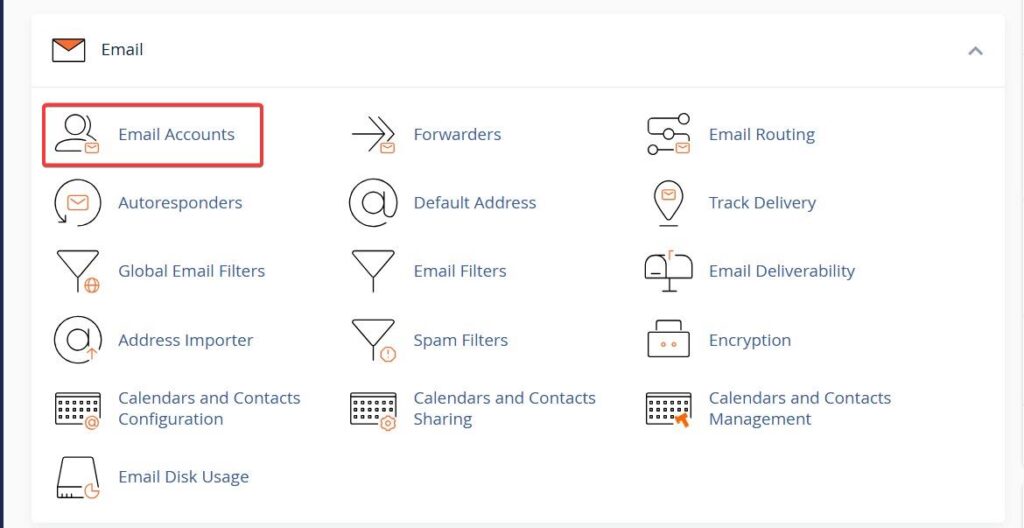
2. Navigate to “Email Accounts”
- On the cPanel dashboard, scroll down to the Email section.
- Click on Email Accounts.
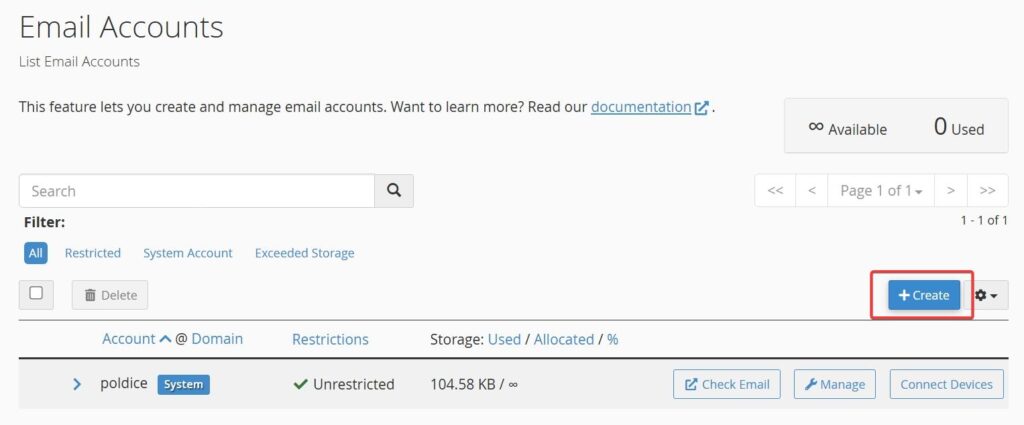
3. Click “Create”
- On the Email Accounts page, click the Create button on the right-hand side.
4. Fill Out Email Details
- Domain: Select the domain you want to create the email for.
- Username: Enter the desired email prefix (e.g., “info” to create info@yourdomain.com).
- Password: Choose a strong password or click Generate for a secure one.
- Storage Space: Set a mailbox quota or choose “Unlimited”.
5. Click “Create” to Finish
- Once all fields are filled, click the Create button at the bottom of the form.
- Your email account is now active!
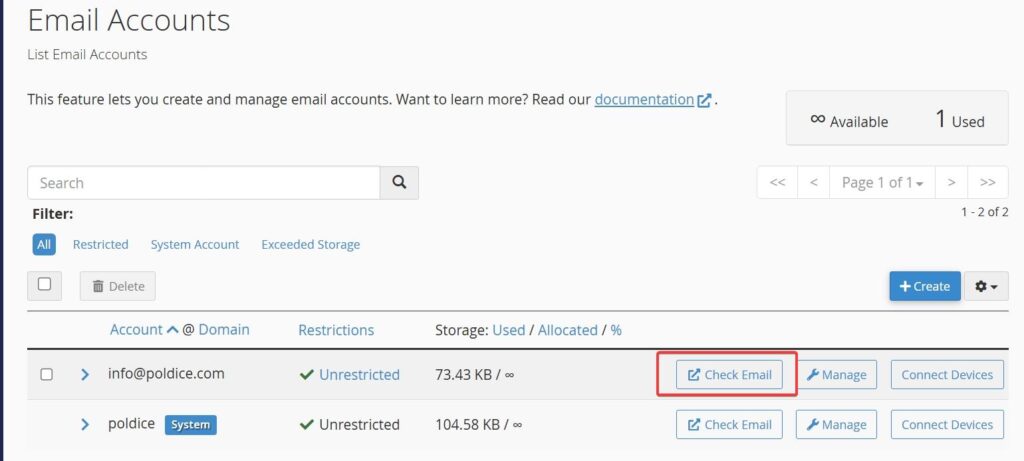
Accessing Your Email
You can access your new email account in several ways:
- Webmail: Click Check Email next to your account in cPanel or
- Login with the email credentials by visiting:
https://yourdomain.com/webmail
- Email Clients: Configure your account in Outlook, Thunderbird, Apple Mail, or mobile apps using the provided settings.